
I love the way tee-shirt fabric drapes :)
Sewing, Crafting, Cooking/Baking, Decorating... Pretty much anything you can Do Yourself


I love the way tee-shirt fabric drapes :)

They are so neatly colored and pretty! You can make so many things resembling them. For example in my last post, OctopusMe, has some pretty amazing octopi themed things. If your interested in learning more about octopi look at this blog- http://www.everythingoctopus.blogspot.com/ A very intriguing blog.
2. Next Elephants.

Elephants are so beautiful! They are so powerful and big. Here's something Elephant-ish for you to gain inspiration from. Are those not the cutest things ever?! And did you know elephants come in a variety of colors?


 (if you don't know what movie these^ are from you NEED to watch Dumbo. Or at least the Pink Elephants Song, tis amazing!!) Why not make something with Pink Elephants on it? That would be awesome.
 3. Last but not least Giraffes.

Awwwwww!!!!! ^

I think a cute project would be a giraffe head band. You could take a head band and cover it in giraffe fabric, or even just plain brown fabric and attach little brown pom-poms onto springs and put them on top. Cute!
Now for some etsy-giraffe cuteness this little stuffy. How cute is that?
Thanks for looking! Hope you were inspired!!
~Courtney ♥
 Also OctopusMe has many other fantastic things that are all made from REAL, yeah that's right REAL octopus!! 0.0 It's really awesome,it's all cast in silver, really neat. All amazing, I love octopi so this shop is one of my favorites.
Just from the front ^
The inside/lining
Button detail^
This bag was made from a burnt orange colored corduroy skirt and some Garfield sheets. I really liked this one, and my dad says that it was one of his favorites as well.
At some point I would like to make a tutorial for a lined bag, I will have to take a break from sewing for a while though!
Thanks for looking!
~Courtney


4. Here's where we're gonna flip the fabric right side out. Take a safety pin and pin it to one side of the tube you've just created, make sure to only pin one layer of the fabric.

5. Take the pin and push it back through the fabric tube you have created, and pull it all the way through until it comes out the other end. Pull until all the fabric is right side out. This will give you a very neat looking tube.

 Finished Tube completely right side out ^

9. Now carefully hand sew the two ends of the scrunchie together overlapping one side over the other so that you have a neat seam and your done!!
Hope my instructions were clear!!
~Courtney
P.S. I weren't sure how to spell scrunchie because I never need to spell it, but I tried my best and I'm just assuming that's how it's spelled, so if it's not sorry!!

From the front ^
From the side^ (the other side has a camouflage panel)
Very brightly colored rainbow lining^
Pocket sewn into the lining^
The strap is the hem of the sheet sewn into a strip of denim.
Messenger Bag Tutorials
So I pretty much make my own pattern as I go every time I make a messenger bag, but i know not everyone knows the basic messenger bag shape, size and how to put it all together. So here's five different tutorials for five different messenger bags:
Here's how to make a duct tape messenger bag.
Here's how to make a very nice lined messenger bag.
A messenger bag out of fused plastic bags (and how to fuse the plastic bags!)
And just so you know, I did not make any of these tutorials nor do I take any credit for them, I'm just showing them to you.
Hopefully I helped!
~Courtney


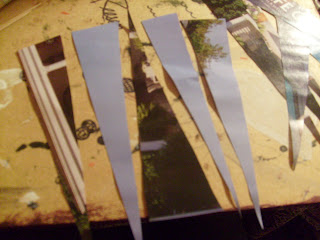
Step 4. When you get to the end of the paper, brush mod-podge over the whole bead and wait a minute or two for it to dry a little bit and them carefully slide the bead off of the toothpick.
Step 5. Let them dry for half an hour then add another coat of mod-podge to add extra shine a durability. And that's it!! They should look something like this:


Thanks for looking!!
~Courtney :)
P.S. Please excuse the bad pictures, my photography and my camera are terrible.
.jpg)